
After months of trial and error, I finally have not one, but two fully functional FGC-9s. If any of you followed my journey over at The 3D Print General (now 3D Pew General) YouTube channel, you likely have seen my numerous videos building an FGC-9 MKII. Since I think I have experienced every issue possible on this thing, I figured it would be beneficial to cover what I have learned so you can skip right to a functional firearm. Please keep in mind that this will not cover the ECM process at all, which is a separate tutorial.

My rabbit hole of 3D printed guns started back in April 2021 when I attended Bear Arms and Bitcoin in Austin, Texas and was lucky enough to shoot numerous homemade firearms with the Deterrence Dispensed boys. At this point of my life I was pro-gun, but I only owned one firearm. I actually never even shot a rifle or much of anything other than my California Compliant 9mm Sig P229.
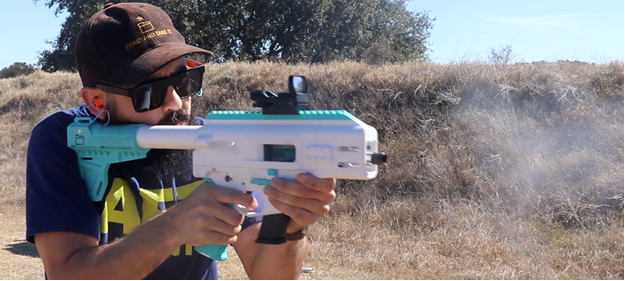
Along with getting a crash course lesson in guns, I had the opportunity to shoot the FGC-9 MKII before the files had been released to the public. This is the gun that had really peaked my interest in 3D printed firearms, having it be able to be built entirely at home without the need for any gun parts. While things like Glock and AR lowers are cool, they never really got me excited the way the FGC-9 project had. You can watch my full video of the event here:
And I was certainly spoiled, because that FGC-9 worked flawlessly for me, and for others, during the Bear Arms and Bitcoin event.
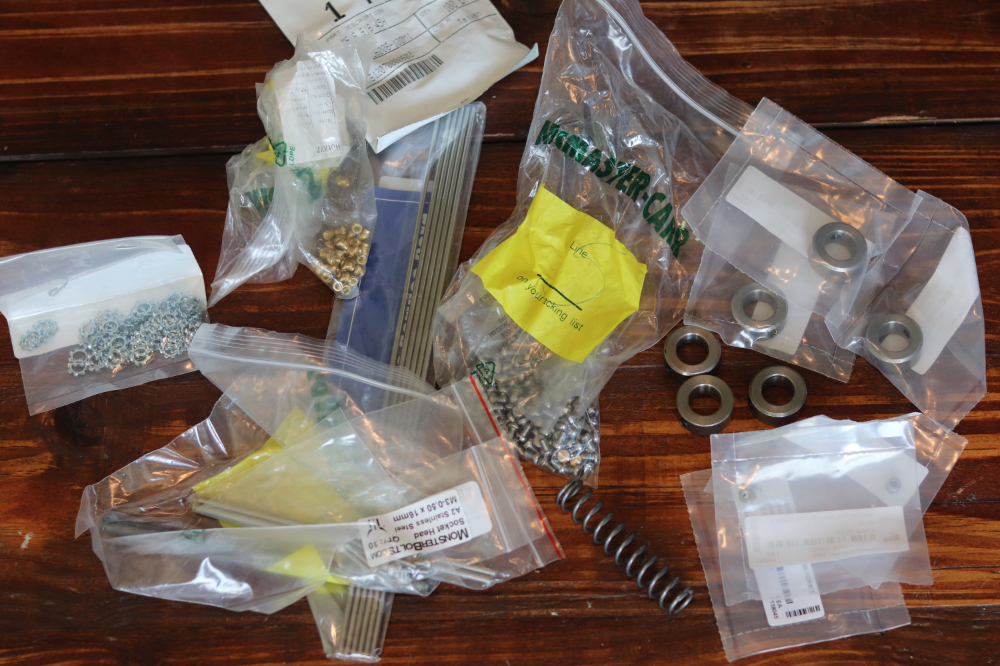
So after getting home, the moment FGC-9 kits became available at MAF, I ordered myself one. Remember you can build this gun entirely at home, but I went the easy route and just purchased a full kit. I also purchased just about everything suggested to buy in the build tutorial PDF. This was my first lesson – if you buy a kit – you don’t need many of the things stated in that build tutorial. While it isn’t a bad thing to have spares, these are the parts I bought that are not needed when grabbing an MAF Kit: Shaft collars, set screws, secondary buffer print, firing pin spring, mag catch spring, lock washers, thread inserts, and various washers and nuts.
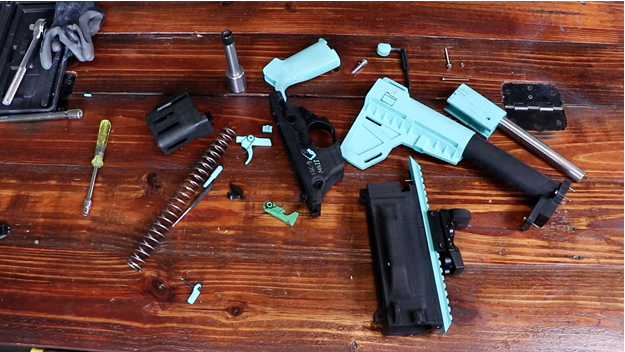
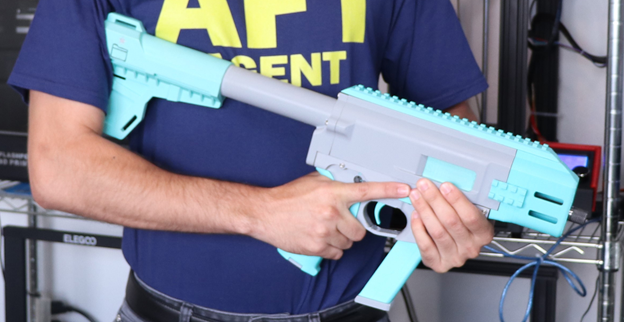
My first run of prints for this FGC-9 were in PolyMax PLA by Polymaker in Black and Teal. You can watch the video of me building it here:
And this first build definitely taught me a lot. Here are some of my initial notes.
- You should not print the fire control group unless you do not have access to machined one. This AR-15 fire control group has to be one of – if not the most – important component to not only have your FGC-9 function properly, but safely. Remember – I had no idea how an AR-15 functioned before this, so this was my first time seeing a fire control group – and I printed it. After analyzing it, these parts are quite thin and have a lot of spring pressure on them. One issue and your hammer, trigger, or disconnect or can break leaving you with either a firearm that no longer works, or one that turns into full-auto mid magazine. I also would HIGHLY recommend against ever keeping a round in the chamber, since if that hammer were to break, your FGC-9 will fire, even if it is just sitting in storage. Only 3D print your fire control group if you have no other option.
- If building your own magazine and not using a standard Glock mag, then I would highly suggest investing in a strong metal vice. The magazine springs you order off of Ali Express require some bending and squeezing to get them to function properly. I have an ABS 3D printed vice, and that certainly wasn’t strong enough to squeeze those metal springs. I ended up getting it to work, but a metal vice would have made the process a lot simpler.
- The M3 hex head screws that the build guide says to use to connect the barrel retainer to the upper can be very frustrating to screw in. I have an extender for my socket wrench set but it did not fit in the gap under the right and left sides of the barrel, meaning I had to get kind of creative to get those tight. I would recommend using socket head screws where you can use Allen keys, since you can get a long one that will extend out of the barrel retainer and it will make your life a lot easier when screwing them in.
- Make sure you cut 2-3 coils off of the buffer spring sent by MAF if you buy the kit. They say this on their page, but I missed it, and had difficulty figuring out why it was so hard to rack the charging handle.
- Print very thin parts that are under spring pressure in a higher temperature resistant material. This likely is not needed if you live in cold climates, but living here in Texas the summer heat is just too much for these thin parts. This would include the entire fire control group if you were to print it, the magazine, and most importantly the mag release tab. You do not need to go crazy and use something like polycarbonate, basic ABS or ASA will work just fine for these parts. Since I tested my gun in August in Texas, every one of these parts ended up malfunctioning because they were thin and under spring pressure with 100+ degree Fahrenheit heat. PLA (and its alternatives) can only handle around 130 degrees Fahrenheit before deforming, but it can be a decent amount less than that when parts are thin and under spring pressure. So while the large parts of the FGC-9 are fine in PLA + or PLA Pro, I suggest you print these in ABS or similar temperature resistant material if you live in hot climates.
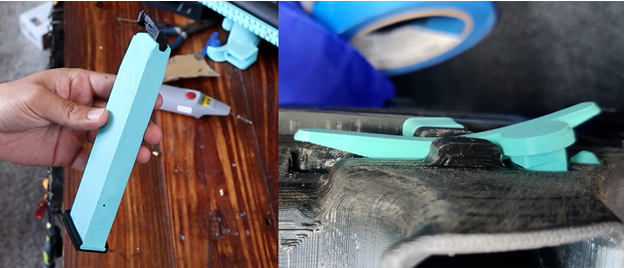
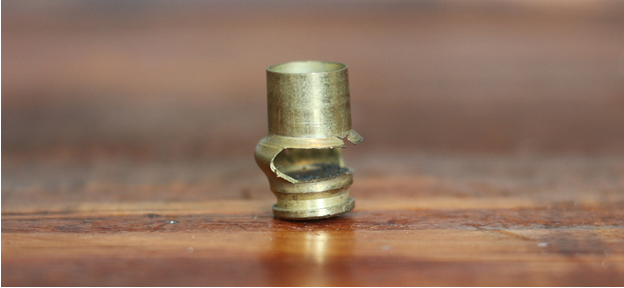
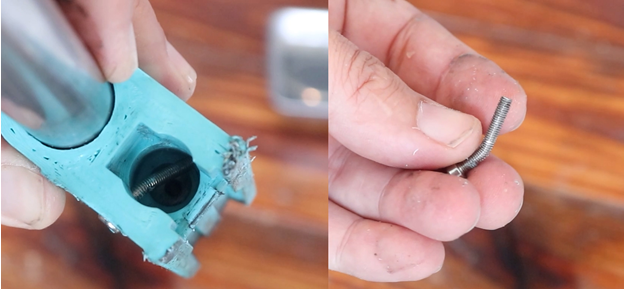
This first outing I ended up only getting around 5 rounds to shoot properly before things started to malfunction. First my magazines turned into what is shown above, then I started to get binary firing likely due to my fire control group deforming, and finally I got that magazine release tab in a banana shape. All of these issues are due to that extreme heat and thin parts under spring pressure. You can watch the full video of this first test here: <youtube removed the video>
Now is when I began my numerous rebuilds. I am not exaggerating when I say I rebuilt this FGC-9 five more times with entirely different printed parts. First came my Frankenstein build which I never even ended up shooting:
While I actually do love the look of that monstrosity, I did it before looking into the strength statistics of some of the materials. First of all – that upper is printed in PolyLite Polycarbonate. I loved the look of it and just assumed polycarbonate meant strong. Well PolyLite PC is anything but strong and can crack extremely easily – meaning using it for the upper was a terrible idea.
Next came my build in ABS and ASA – the teal parts being in ABS and the gray parts being in ASA. ASA is extremely similar to ABS, just with the added benefit of being UV resistant:
While the photo above shows a printed fire control group – I did end up using a factory made fire control group before shooting the weapon.
I was very hopeful for this build – but it must be noted that when you print in ABS or ASA – particularly if you do not have an actively heated chamber – you may experience slight shrinkage. This caused it to be very difficult to fit the barrel into the barrel retainer and the upper. It took a decent amount of force. You do not need to print these large parts in these higher temperature materials – you really only need the parts I described earlier.
It seems I had consistent feeding issues – and these are potentially very dangerous. The ammo kept feeding into the barrel less and less, and this is exactly what will cause an out of battery. Now I did end up finding the real culprit, but during this filming it ends up that the tab on the front of the upper cracked. I assume this is from the extreme force I needed to get the barrel in, but I was also wrong to think this was the reason I had constant feeding issues.
While that was definitely an issue – I do not think that was the reason I had constant feeding issues. I ended up reprinting everything once again – this time in PolyMax PLA again, but I kept the magazine release tab and magazine in ABS and ASA:
I was even more hopeful for this build, because the large parts in PolyMax PLA fit together great, the thin parts in ABS and ASA would prevent deformation, and I am using a purchased fire control group. This was fixing everything I thought I had done wrong in my past builds. And well – this is when I had the worst possible problem – an out of battery:
Unfortunately I do not have any better footage or photos of this out of battery occurring, but what was happening was similar to my last build – rounds kept feeding less and less into the barrel until I got that out of battery.
I got extremely lucky since the only real damage to my printed parts was the upper expanding where the barrel is seated. This definitely proves that PolyMax PLA is no joke in its strength being able to handle this out of battery:
Now I am not going to lie – I was very confused at this point. I know FGC-9’s could work – I shot one at the Bear Arms and Bitcoin event. I was confident in my prints – they looked great, were clearly strong, and everything fit together nicely. This was also my fourth or fifth rebuild at this point, so putting it together was becoming second nature.
Well I did end up finding the culprit. I am 99.9% sure it was due to my barrel being slightly out of spec. You see, one of the most important things you can do when building your FGC-9 is to make sure rounds that are put into the barrel can fall out easily. The build guide has these instructions in them, but when I did my initial test of this – I only tested out snap caps. And those snap caps seem to be a little bit smoother and will go into battery and fall out a lot easier than a normal round.
When I used a real 9mm round, it would not fall out of the barrel and actually required a flat head screwdriver to pry it out:
When I used a real 9mm round, it would not fall out of the barrel and actually required a flat head screwdriver to pry it out:
Since this is what I figured was causing me my feeding issues – I went ahead and purchased an entirely new kit from MAF. After doing so – they were actually kind enough to just replace my out of spec barrel, so I ended up having two complete FGC – 9 kits. So what was I to do other than to build two more FGC-9s:
Before building these I made sure to check the barrels properly. Both of these new barrels would have 9mm rounds fall out via gravity after slamming a round in with my palm. Way better than the first barrel.
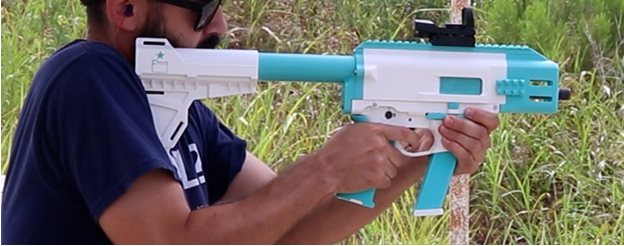
Now to cover what these were made out of. In the time since my first ABS and ASA build – I added active heating to one of my 3D printers. This means I could reliably hold 65 degrees Celsius ambient air temperature, versus the 45-50 degrees I had on my first build. This increase of 15 to 20 degrees Celsius can make all the difference when printing in ABS or ASA to really make sure layer adhesion is strong and to reduce shrinkage. So the back FGC-9 in that photo has the teal parts in ABS and the white parts are in ASA and acetone vapor finished.
After numerous tests on other firearms, I do not suggest acetone vapor finishing your ABS or ASA builds since it does weaken it, but this particular FGC-9 has held up great, so it works on this build.
Since I now have a printer with higher ambient air temperature, I thought it would also be fun to try out some strong polycarbonate, and so the front FGC-9 is printed in Polymaker PolyMax PC. PolyMax PC boasts some really insane strength statistics, making it extremely different than their PolyLite PC. The issue is that it wants to be printed with very high ambient air temperatures.
Polymaker suggests an ambient air of over 70 degrees Celsius, but I thought my 65 would suffice. While the parts printed pretty – it ends up that ambient air just isn’t quite high enough. Once you start approaching 80 degrees Celsius, you will need remote or high temperature stepper motors, which my printer does not have, so I didn’t want to go over 70. Looks like that is needed when printing large, dense parts in polycarbonate. So, unfortunately, this PC build cracked on me after a couple of shots:
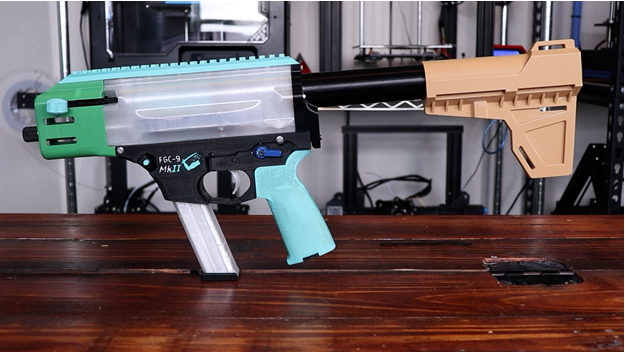
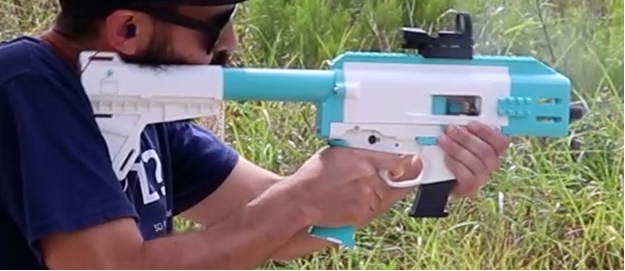
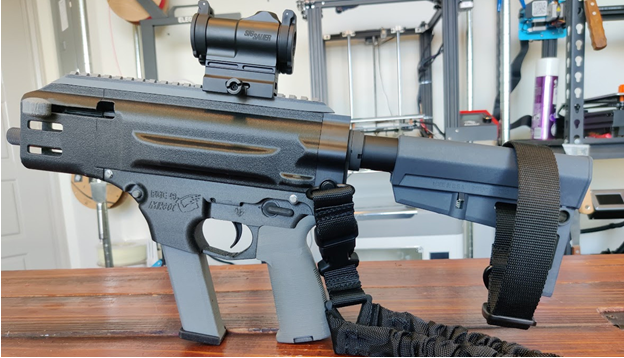
You can see in the photo above that I am using a standard Glock magazine. While the 3D printed magazine I had in ABS and ASA did work for numerous tests on a standard Glock, I think it eventually got worn out a bit and wasn’t feeding great anymore. But I put around 120 rounds through this FGC-9, and I only had one feeding issue the entire time. That is certainly a success.
Since the only thing I changed was the barrel, this is why I am 99.9% sure it was that out of spec barrel that was giving me so many feeding issues – leading to an out of battery.
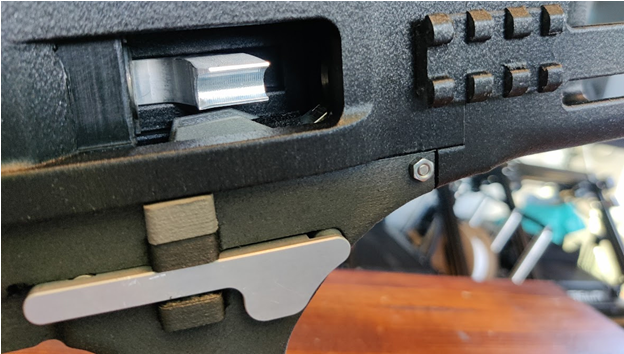
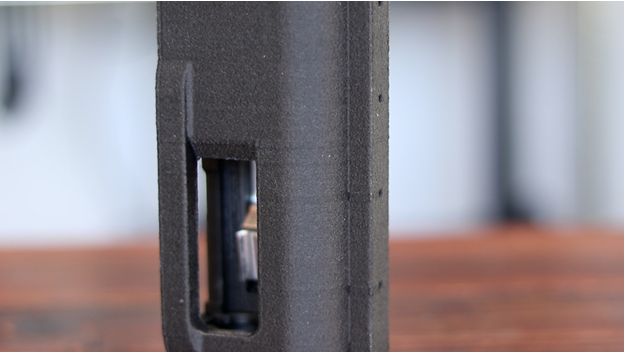
While I was extremely happy this worked, there was still one issue that needed addressing. It looks like my screw that held the firing pin in place got loose from its nut, meaning it started to drag on the inside of my upper, causing it to be difficult to charge after about 100 rounds:
While I thought I did, it ends up I did not use thread locker holding the nut onto the screw. This is yet another lesson learned that you should take seriously – use thread locker on this screw where it attaches to the nut on the side of the bolt retainer.
Since I still had a full kit on the PC build, I decided to reprint and rebuild yet one more FGC-9. This time I wanted to try and make another strong build, going with PA12-CF Carbon Fiber Nylon by Polymaker:
Every black part in that photo is PA12-CF and the gray is PA6-GF (glass filled). There was no particular reason I went with glass filled nylon other than the fact I liked the gray color. What makes this really different than your standard FGC-9 is not only the materials I used, but I have every Riptide Rails upgrade. Now these upgrades clearly aren’t needed, but I was trying to build the “strongest” FGC-9, and they were kind enough to send me a metal magazine release tab, feed ramp, ejector, and buffer tube adapter.
Having a metal feed ramp and magazine release tab are likely the two best metal additions, but the buffer tube adapter is pretty cool – allowing me to use a normal AR buffer tube.
While carbon fiber nylon prints beautifully and is quite strong, there are a couple of negatives to it. First point isn’t really a negative, but it does require a higher temperature hotend (280 degrees Celsius) as well as a hardened nozzle to prevent abrasion. Next is a pretty big negative, and that is that it will slowly absorb moisture. Nylon is extremely hygroscopic, meaning it will absorb moisture over time, causing the part to be slightly weaker and also have a bit more “give”. You can help to prevent this by annealing the parts right after you are done printing them, but even then water will be absorbed.
Hoffman Tactical is currently testing out soaking parts in oil to prevent the water absorption – so make sure you are subscribed to him if you aren’t already.
Third is knowing what the blend of your carbon fiber nylon is. I tried printing in PA6-CF and that gave me some issues. While PA6-CF boasts stronger statistics than PA12-CF, it prints a lot more rough and also seems to have some shrinkage to it.
This upper was printed in PA6-CF and had a very course texture to it and also gave me a lot of issue fitting parts together. That ejector just wouldn’t fit in its holder without an extreme amount of force, and sanding this material is not simple. PA6-CF may also absorb moisture more, so I would suggest going with a PA12-CF blend if you wanted to print your firearm in carbon fiber nylon.
The final negative is that it is difficult to lube a carbon fiber nylon part. Whenever I added lube to the inside of my upper, it seems to have slowly absorbed said lube, meaning it never really stayed very slick. It ended up working great but I was a little concerned by the fact it was difficult to lube.
And while this gun worked great, there was the added issue of it binary firing. While it was certainly fun shooting a binary firing FGC-9, it wasn’t supposed to do it and could add danger for a potential out of battery. If you let go of the trigger too fast, the next round may not have had time to properly go into battery, so I would not suggest doing what I did. That said – I had a blast binary firing it – you can watch that video here: https://www.youtube.com/watch?v=DuA55QdFEZ8
I think I was getting a binary fire because the pins on the lower were pushing away from each other, and the lower having absorbed moisture allowed them to give slightly.
I got the tip that I could Dremel down the bottom of the front of the disconnector to prevent binary firing, and that ended up working perfectly. So if you have a similar situation, I would recommend doing that, since binary firing can be fun, it may be dangerous on a build such as the FGC-9.
This entire process you just read is a year of building and rebuilding condenced into a few thousand words. I hope you learned some things from my trial and errors and I can hopefully prevent future failures and out of batteries. Keep your hands intact and make sure you spread the signal safely.

")

Leave a Reply
You must be logged in to post a comment.