
Purpose
The purpose of this guide is to show that CAD is not as difficult as it appears to be by offering a very simple beginner’s project that gives the participant a victory to put under their belt.
Introduction
I am admittedly an amateur in CAD work, as I am still very much learning Fusion360 as I write this guide. While this guide appears long, it’s mostly photos and screenshots so don’t worry about pages and pages of random text!
Getting started in CAD work seems like it’s an impossible task, a veritable sisyphus-ian effort.
Well, with any luck, this guide should remove some of the mystery that surrounds this relatively easy-to-learn software. It should also show that doing cad work, be it for whatever purpose, is easier than it looks on the surface.
In this guide we’ll be modeling a thumbtack, which employs the most basic of tools provided with the software. These tools are as follows: Sketch, Extrude, Fillet, and Mirror Revolve.
If you become overwhelmed, it’s important to take a step back and breathe. Don’t give up on yourself!
Tools needed-
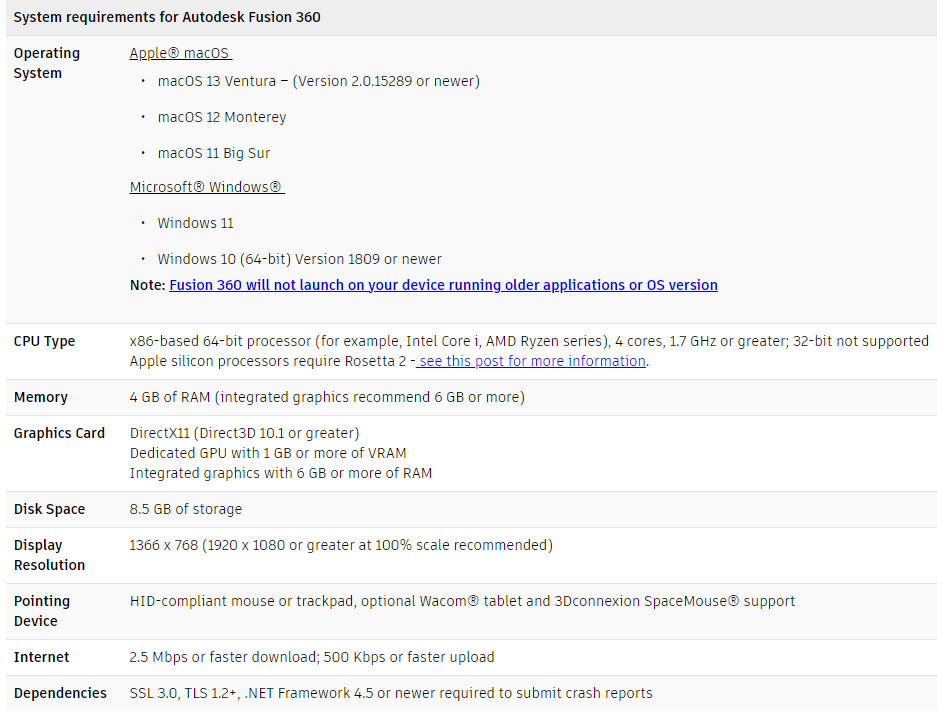
- A computer that can run Fusion360 – Full System Requirments
- A set of calipers. Almost any will do. You will get by just fine with a set of cheap calipers to start. I have the $7 and $15 ones from Harbor Freight (CTRLpew recommends this set from Amazon)
- Something simple to model in the beginning (For this guide, a thumbtack)
- Patience (1 tsp.)
Getting the Software & Making an Account
For this tutorial we will be using Fusion 360. A professional license costs $545 per year but the “Personal Use” license is free! Register & download here.
Choosing what to Model
For your first item, I’d suggest taking something small and simple.
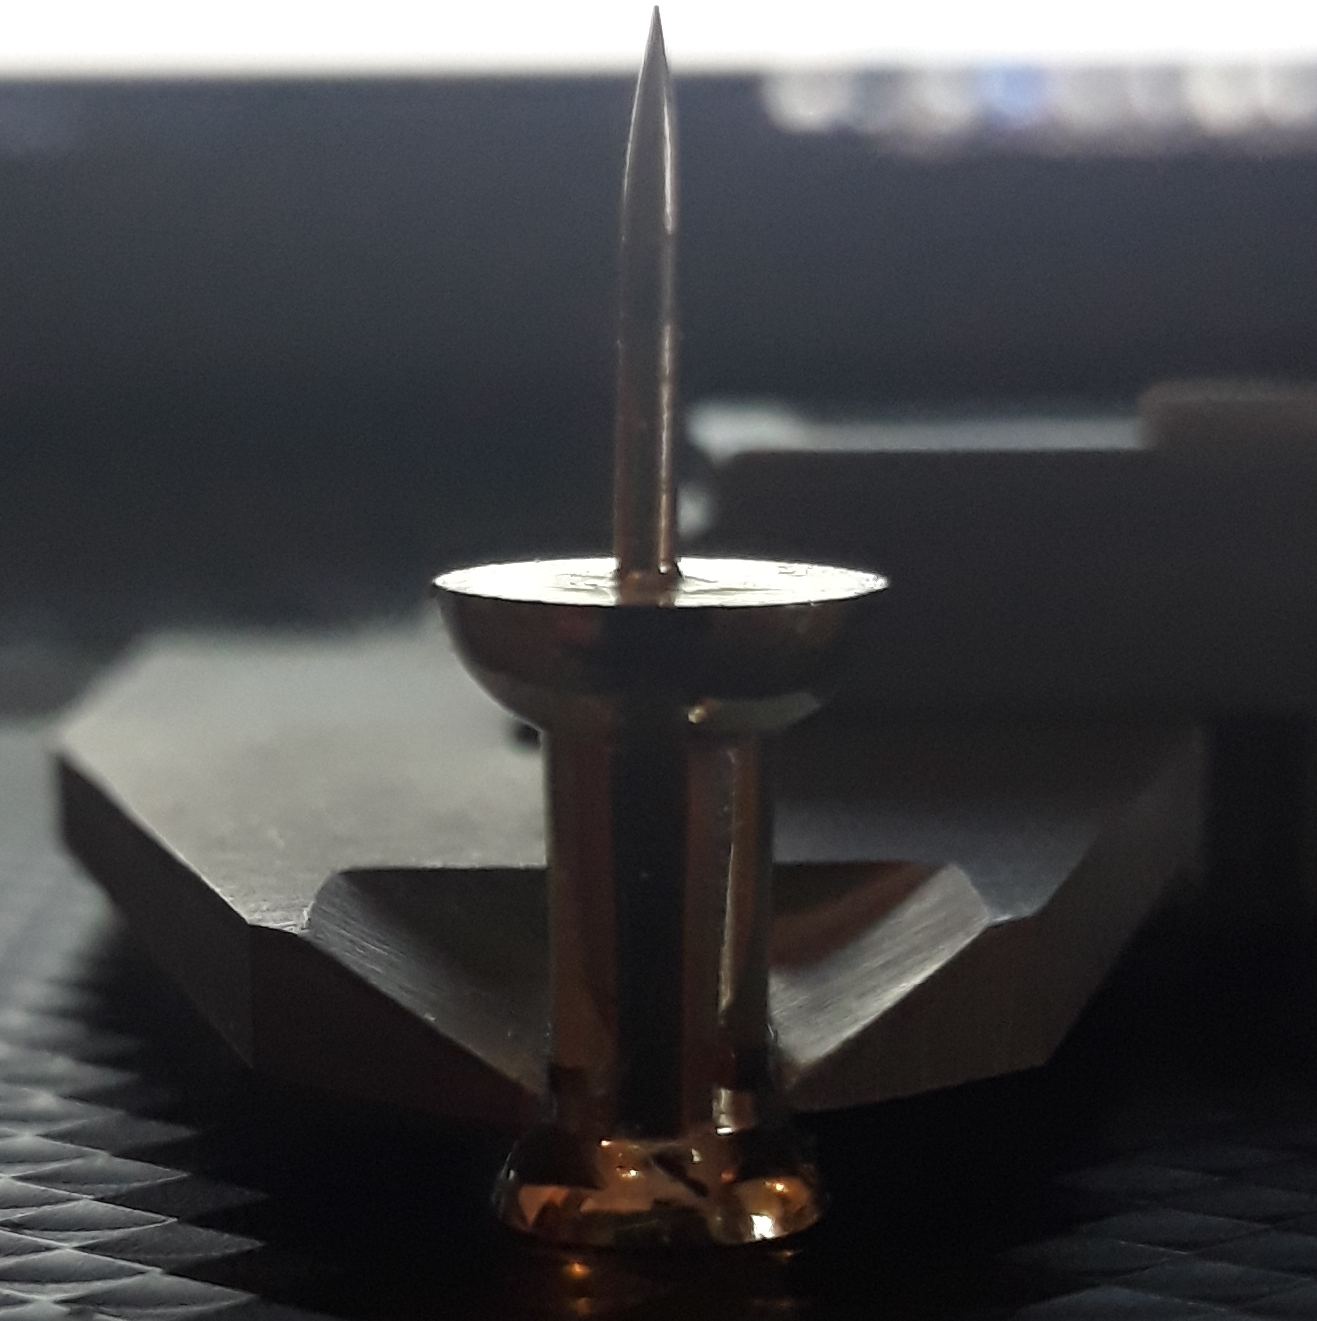
This guide will demonstrate with a thumbtack. (like this guy)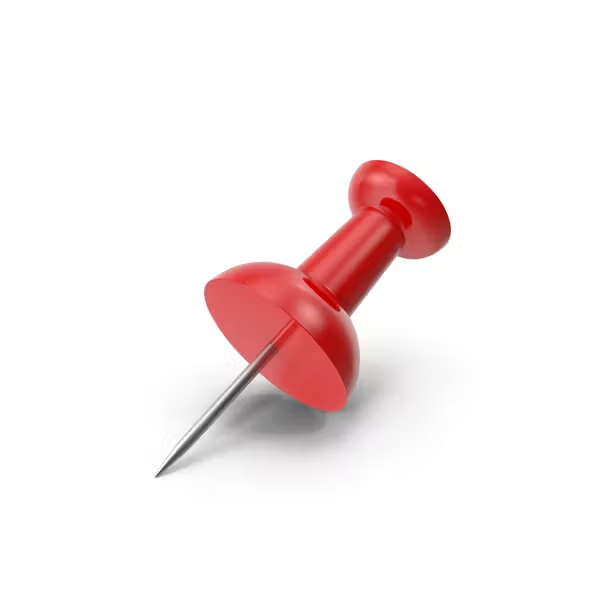
Having a physical reference is best, but it is possible to model from photos as well provided you have a scale to model from.
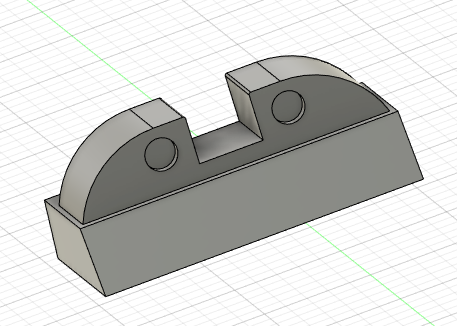
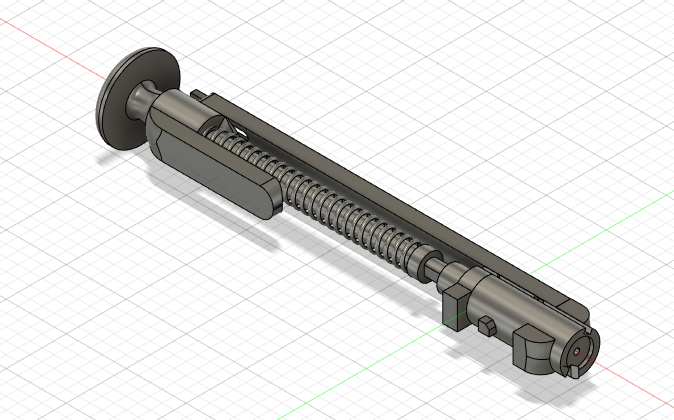
There are simple projects like this rear sight- or much more complicated models like these!
Starting a Sketch
Sketching in Fusion360 is kind of like sketching on a notepad, it’s only in two dimensions.
To start a sketch, you’ve gotta click here.

Clicking here will show three orange squares, these squares represent the three planes that you can start sketching on. Select the blue square. (Shown below)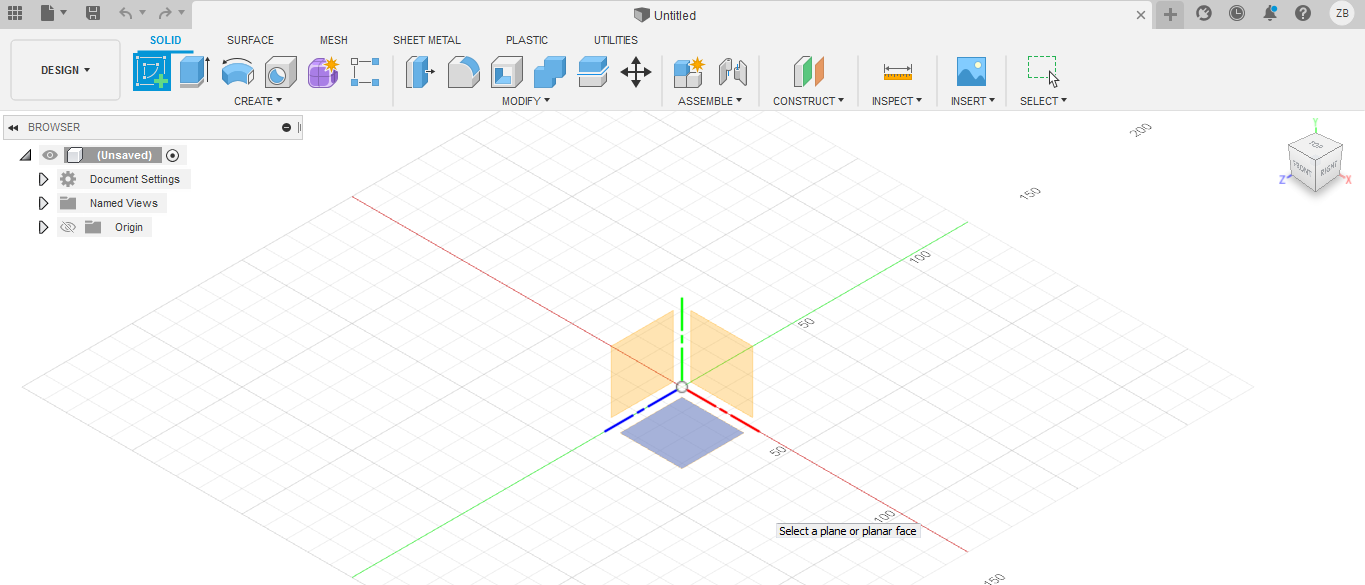
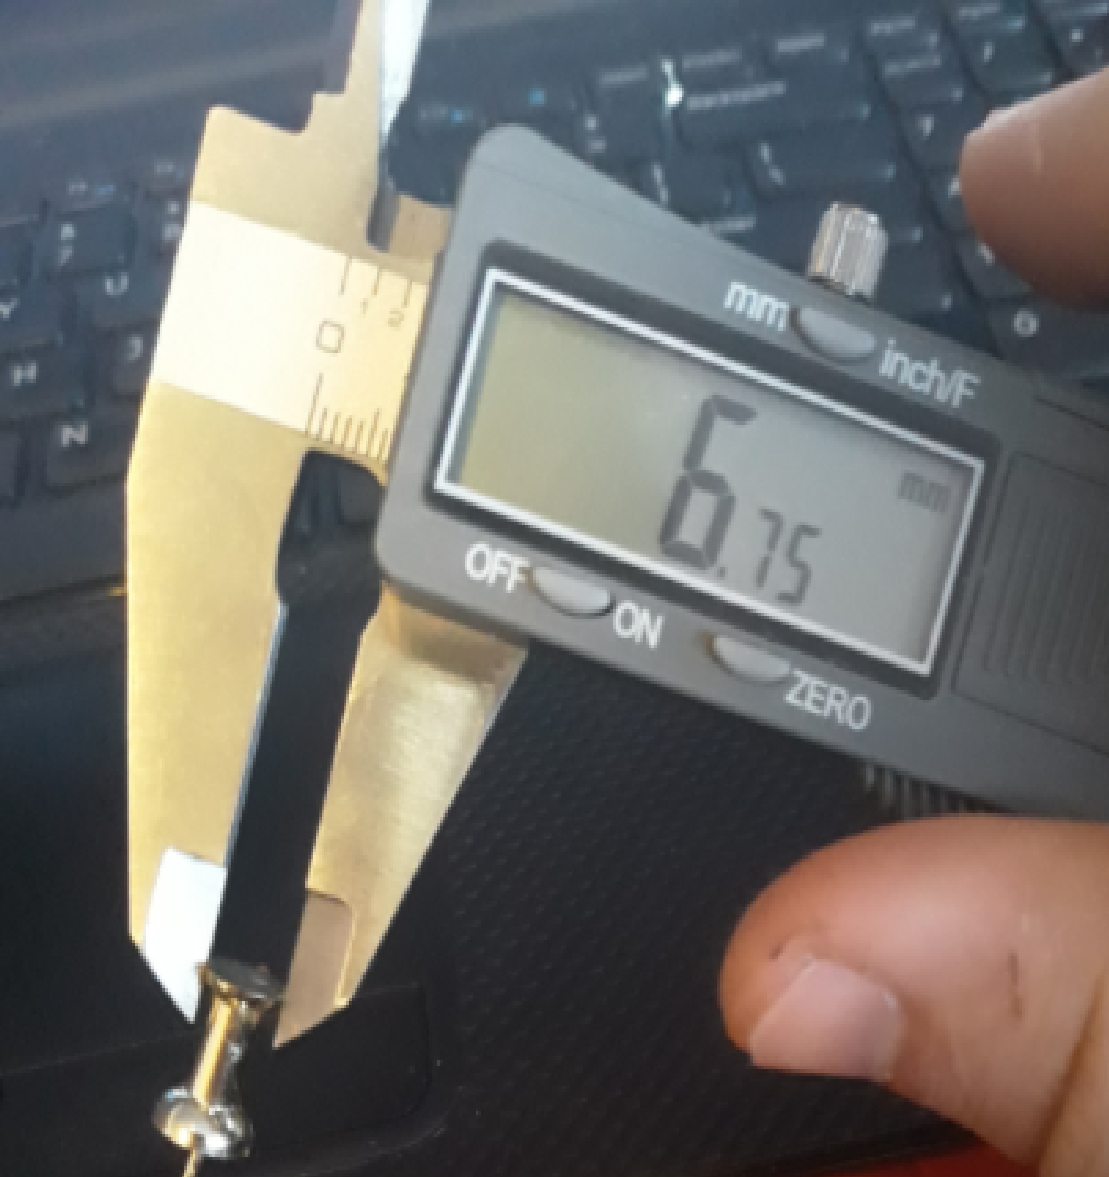
Now that you have your plane selected, it’s time to start measuring your physical reference.
We’re going to start from the bottom and work our way up, so measure the diameter of the bottom of the thumbtack.
After you’ve got this measurement, select the ‘center diameter circle’ button.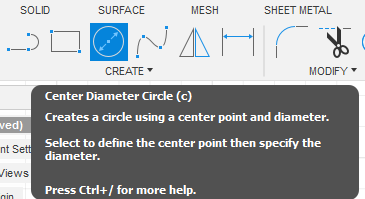
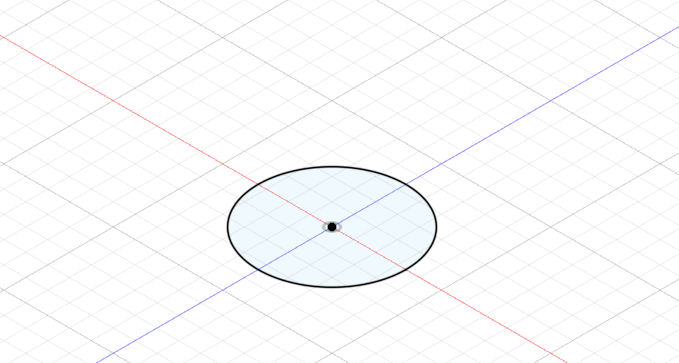
Then you may select a point on your plane, I personally prefer to start in the very middle as it’s much much easier to reference from.
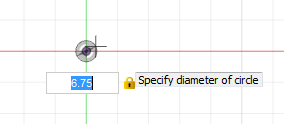
The text box shown is where you can input a specific measurement, in this case, I’ve input 6.75mm. This measurement will lock your sketch at whatever you’ve input. I tend to use millimeters for this software as that’s how it was set up when I started using it, you can use imperial units if you prefer.
After you have input your measurement from the bottom of the thumbtack, click on the
“Finish Sketch” button.


You’re probably going to want to zoom in at this time, so in the bottom-middle of your screen you should see these buttons

Here are your camera controls, for now we’re just going to use the “Zoom” tool.![]()
Click on the workspace with this tool and pull the mouse towards you to zoom in.
Alternatively, you can use the scroll wheel on your mouse.
That’s better!
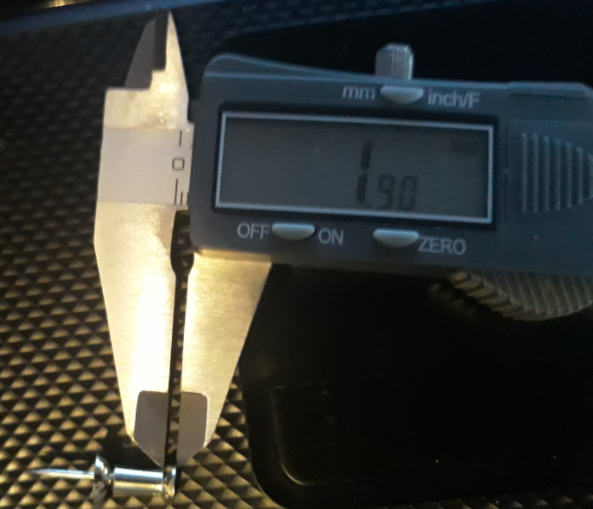
We’re going to extrude the height of this portion of the tack, which I’ve measured on mine to be 1.9mm.
The ‘Extrude’ tool is located right here.
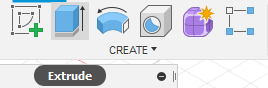
Once you select that, it should automatically select the last sketch you worked on, and opened that little input box from earlier in the guide which allows you to type in the measurement you got.
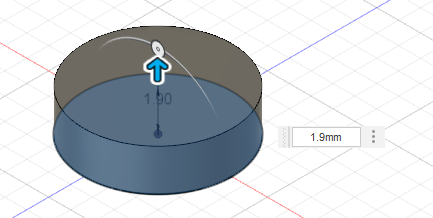
Once you’ve gotten to this point, hit enter and you should be left with a little puck.
Sketching on Your Model
Now that you’ve got the base of your thumbtack modeled, it’s time to start working your way up.
We’re going to go through the same sketching process with a couple small tweaks, we’re practically doing the same thing, just sketching from a face of the model, instead of the endless void.
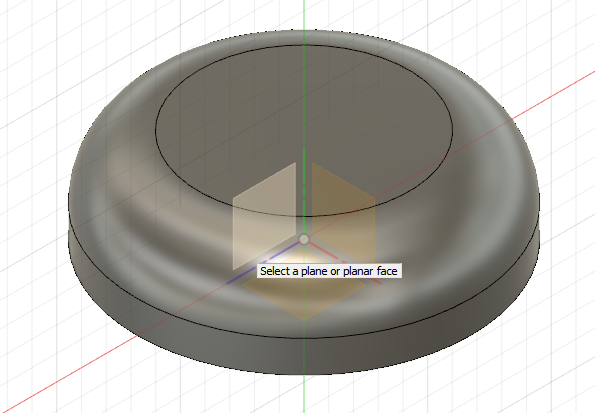
To start this sketch, click the ‘start sketch’ button like before. You’re going to see those same orange squares show up, but don’t click them! Make sure you’re clicking on the top of the little puck, and you’ll sketch directly on that face.
Measure your thumbtack right about (here)
Place a circle in the center of the puck with that diameter.
Once you’ve done this, click “Finish Sketch”
It’s now time to…
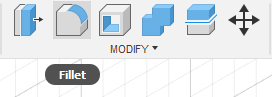
Fillet!
The fillet tool adds a radius to the edge of a part you’re working on.
It adds the radius to an edge you select, which is why we sketched that second circle into our model; it partially acts as a guide for the fillet! When you select the fillet button this menu will show up, for our purposes we do not need to mess with any of these options.
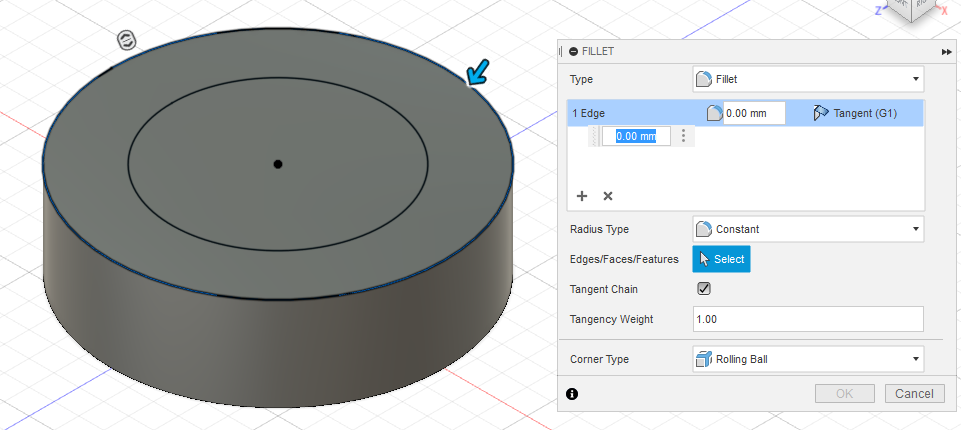
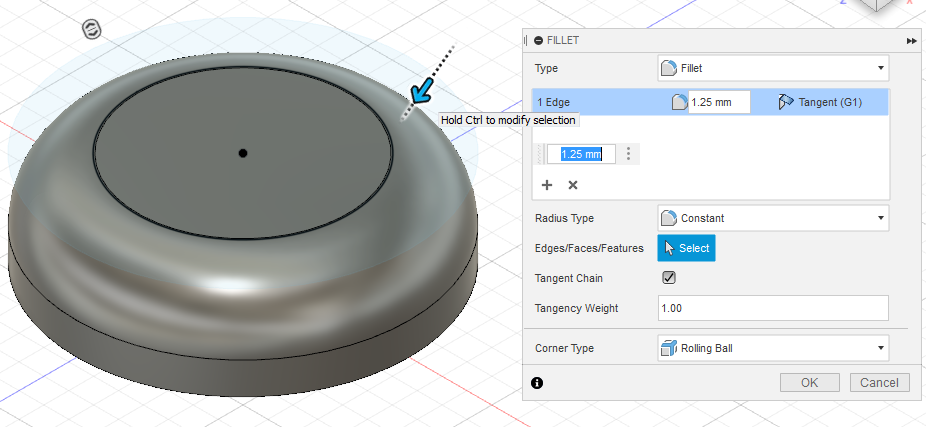
Click where the blue arrow is pointing in the photo and drag towards the ring in the center.
Once you do, you should see something like this.
Revolve
For the next step in this process, I’ve found the ‘Revolve’ feature to be the easiest to use, as the part we’re about to model does not have a uniform shape at either end. (It’s wider on the left hand side.)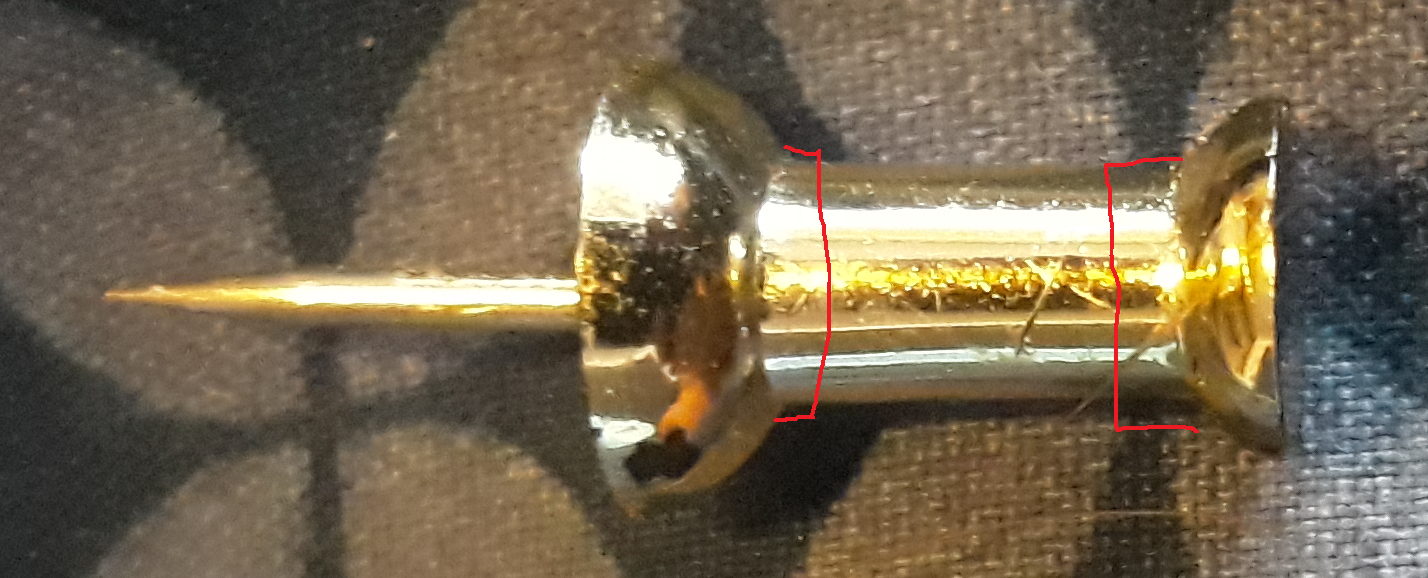
So to get this part of the thumbtack modeled we’ll be drawing in one plane, then using the ‘Revolve’ feature to revolve the plane we’ve drawn around the center of our model.
To start another sketch, follow the same process as we’ve done the previous couple of times, this time selecting the square on the left in the below picture.
Since we’ve oriented the model in the center of the build area, this next step will be much much easier.
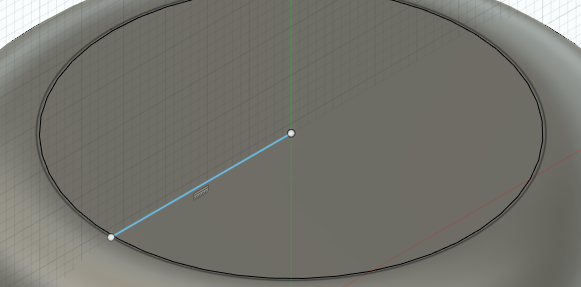
Starting at the bottom, measure the diameter of the bottom circle so you can find your radius.
Use the “Line” tool 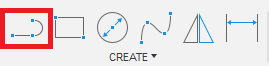 to draw a straight line like this.
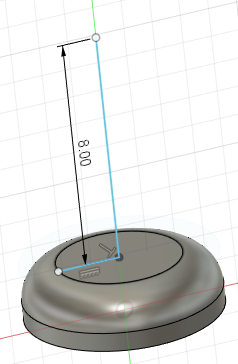
After this, measure the height of the center portion of the tack
(Highlighted in yellow)

I was able to measure mine to be 8mm, so on the model we’re going to draw a line up from the center to 8mm.
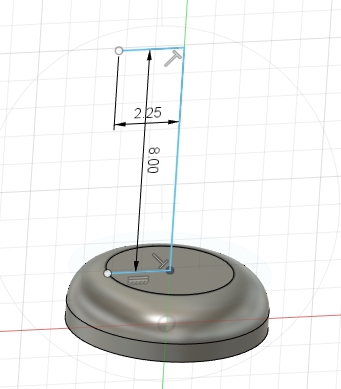
Now, to finish this part of the model, measure the tack at the other end so you can find the radius.

For my model, it ended up being 4.5mm in diameter, so the radius is 2.25mm. Draw a line on your model where it belongs.
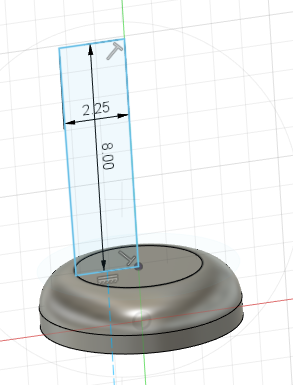
Second to last step is to connect the two horizontal lines together, if you were successful, it should look like this. If it does, hit “Finish Sketch”.
Now, the last step for this function is to actually “revolve” your sketch. This involves selecting the sketch we just completed, picking an axis to revolve around and revolving said model. This will leave you with a solid part.
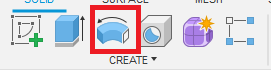
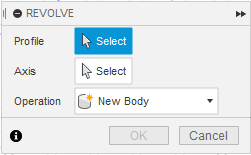
Select this option.
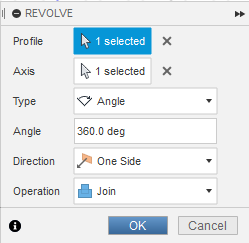
You will then see this menu pop up.
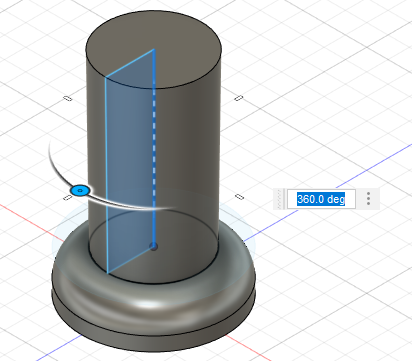
Look at where you just finished your sketch and mouse over it, it should look like this.
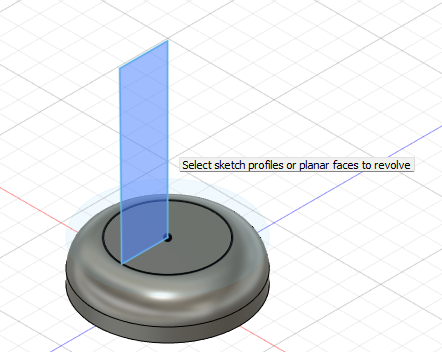
If it does, click once and it will select the sketch. Go back to the “Revolve” menu and it’ll show you have one profile selected. If it does, click where it says “Select” next to axis.
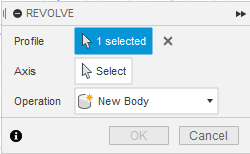
Once you’ve done that part, click the edge of the sketch that’s going up through the middle of your part.
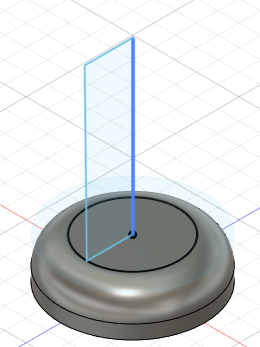
It should automatically revolve around that point and look like this now.
For our purposes, we don’t need to mess with any settings, hit “OK” on the revolve menu to close it out.
I Believe in You!
The rest of this model uses the same processes we’ve covered in the guide so far, so I leave you, dear reader, to finish the job. If you are having trouble completing the model after this point, go back through from the beginning to refresh yourself on how the different operations work.
Exporting Your Model
Once you have your model created, It’s prudent to export your file as an STL. STL files are the most common type of file when working with 3D printers!
Click on the “Utilities” tab, then click on “Make”

Once you click on “Make” This window should show up on the right-hand side of your monitor. (1)
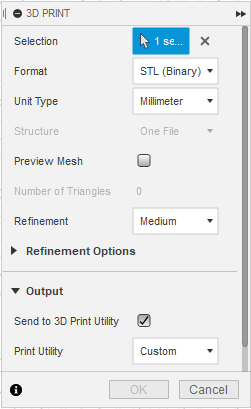 <-1
<-1 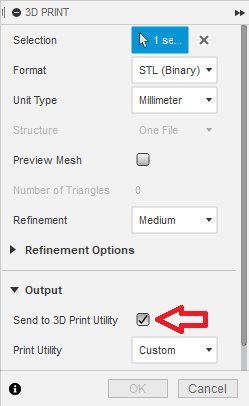 <-2
<-2
Unless you’ve got your printer networked properly, I would uncheck the box shown in (2).
After this, click “OK”.
You’ll then be prompted with this:
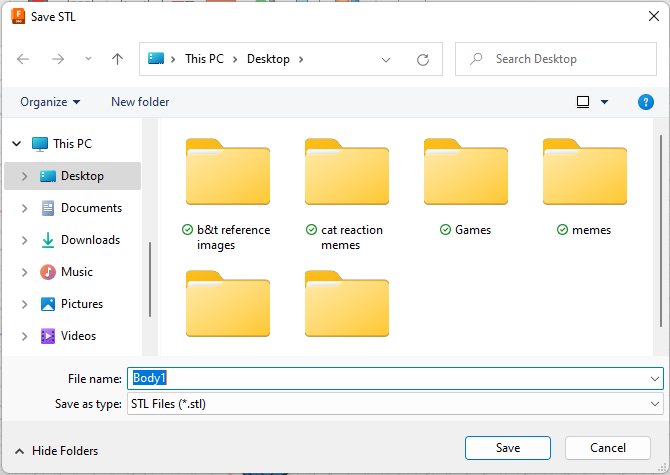
When you’re at this screen you’re able to name your file and choose where it’s saved.
I save most of my files to my desktop because I’m incredibly lazy, but organization is a personal thing, so you do you!
Remember!
There are multiple ways to go about modeling whatever you’re after, this guide is more meant to show you how the basic functions of Fusion 360 work! If you can think of more efficient ways to model then by all means employ them as you please.
Review
In this guide, we covered how to start a relatively simple model using the Sketch, Extrude, Fillet, and Revolve features in Fusion360. It’s important to remember that it’s very easy to get overwhelmed when learning something new, especially when 3d modeling. Always take your time, and focus on one part at a time.

")

Leave a Reply
You must be logged in to post a comment.